USER GUIDE 14
Pause Print at Specific Layer
Do you want to change filament at a specific point? Do you want to embed a magnet or a fastener inside your 3D print? Learning how to pause a print at a specific layer height is a useful technique that will open possibilities that take your objects to the next level.
This tutorial specifically focuses on how to pause at a layer height using Simplify3D®. For our example, we will be embedding a magnet inside a 3D print.
Step 1
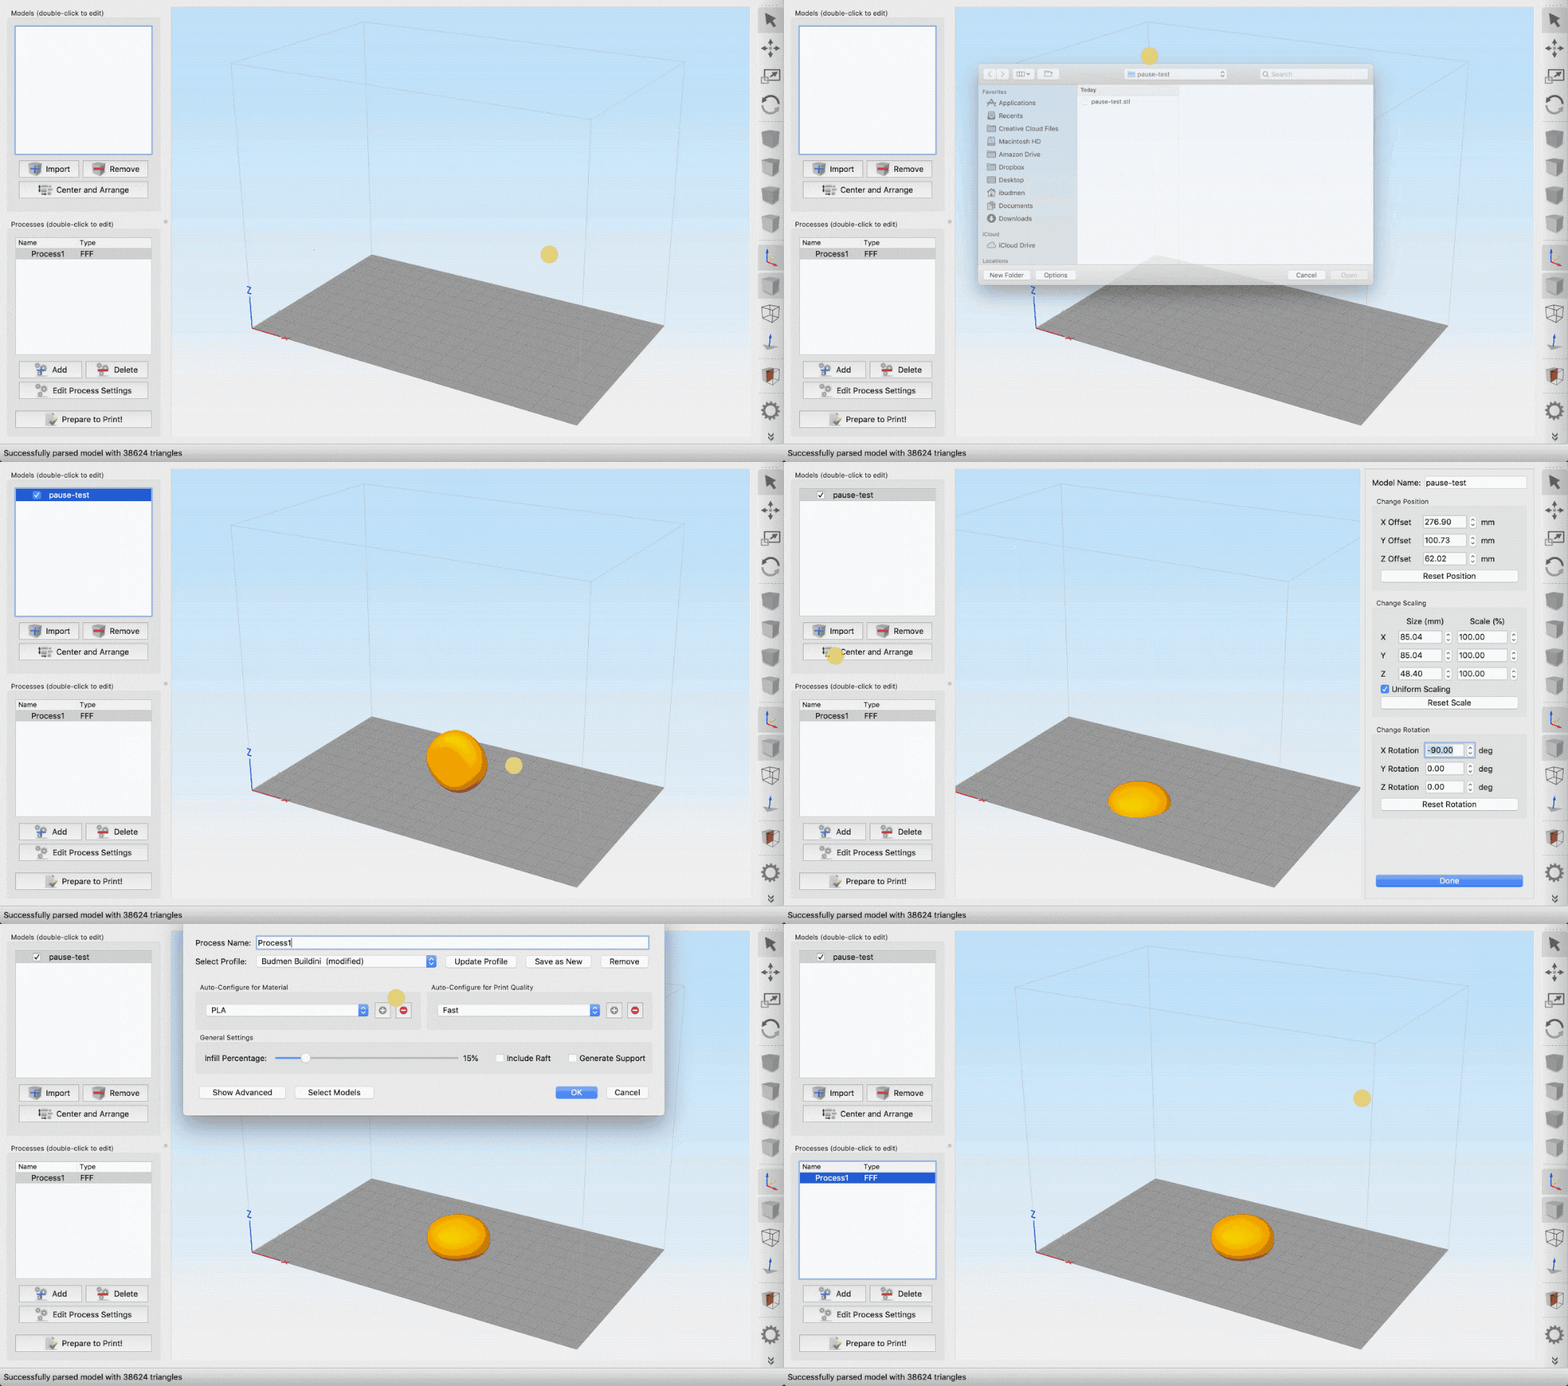
OPEN YOUR .STL FILE IN SIMPLIFY3D
Open your .STL file in Simplify3D as you normally would.

Step 2
FIND YOUR LAYER NUMBER
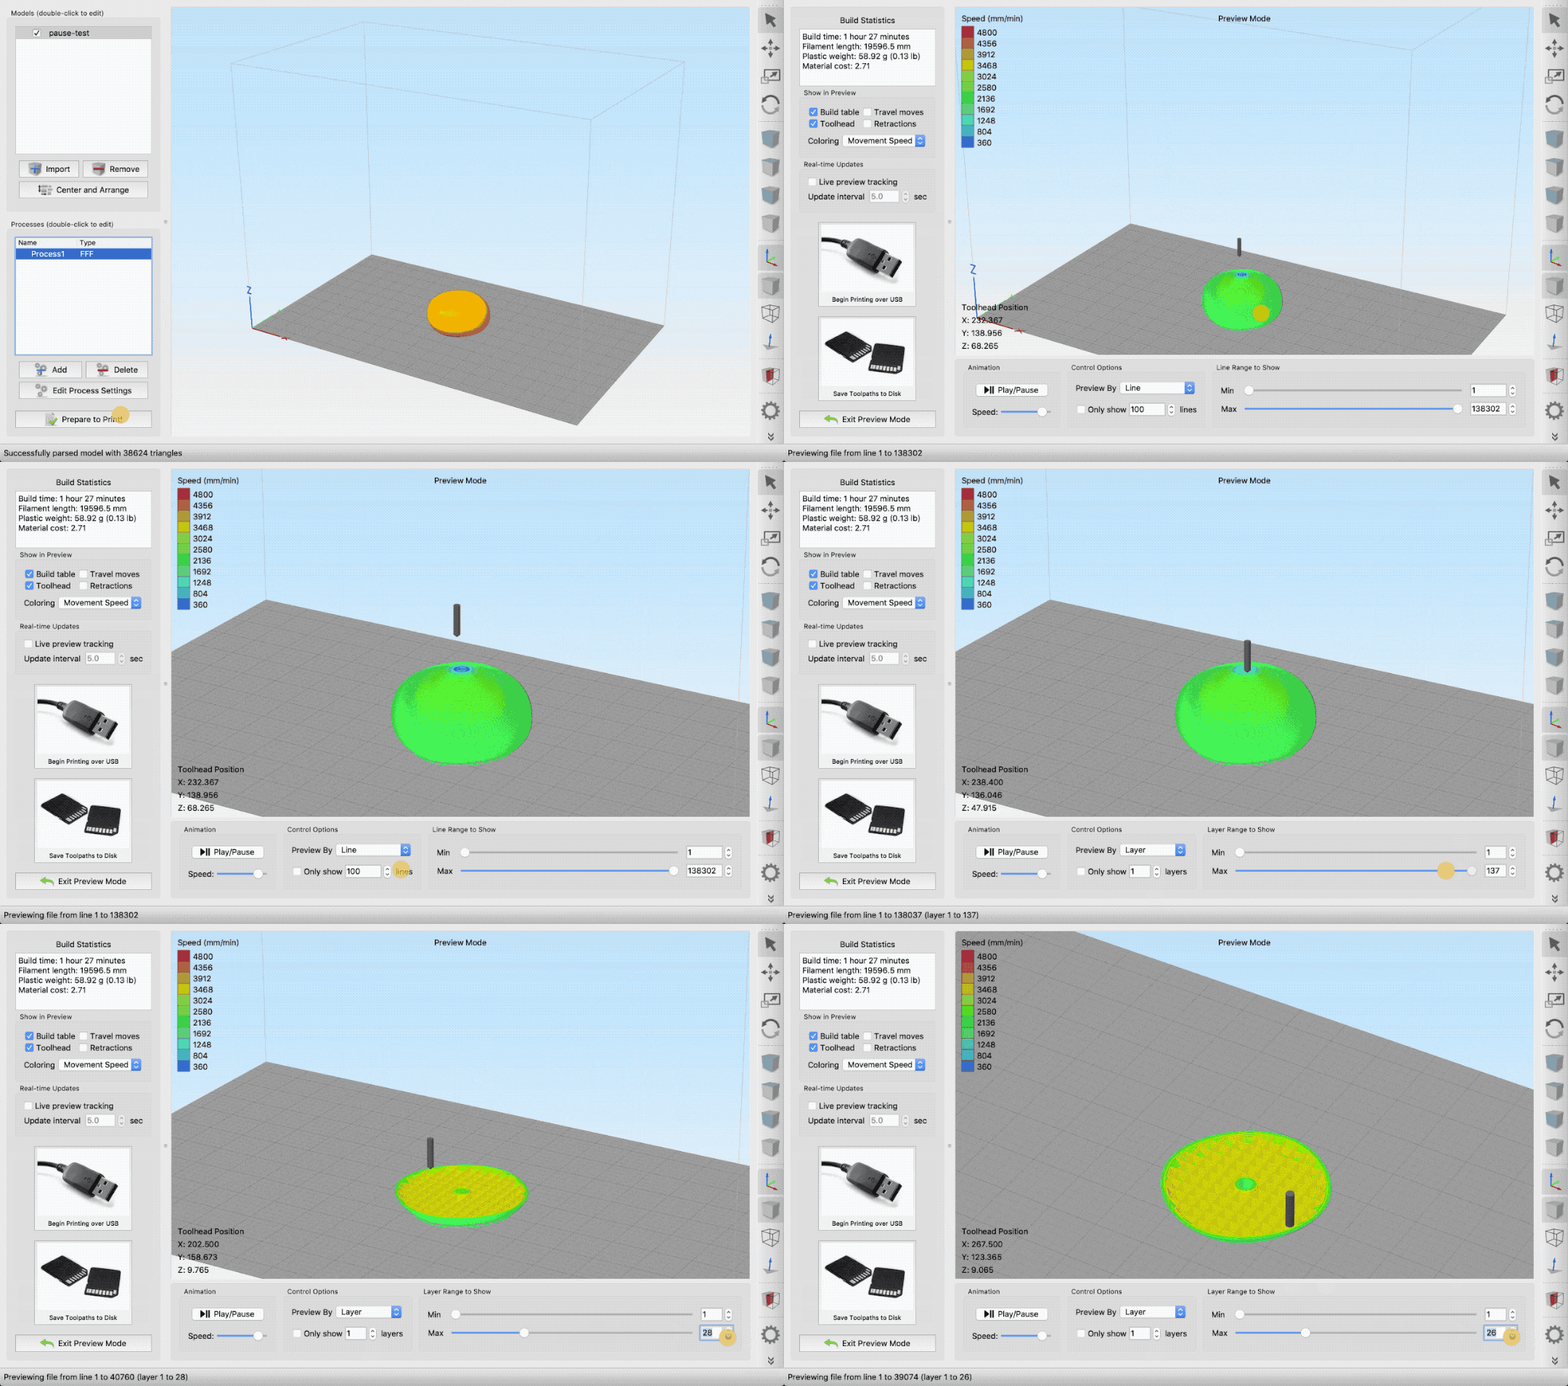
Set your slicing settings and orient your model as you normally would, then click Prepare to Print.
In the Print Preview window, there is a box along the bottom called Control Options. From the Preview by dropdown menu select "Layer".
Now use the Max slider to find the layer where you would like to pause. Write down that layer number, you will need it in the next step.

For this tutorial, we will pause at layer 26. This is the last layer before the magnet cavity is covered.
Step 3
GENERATE LAYER PAUSE CODE
Take the layer number you wrote down in the last step and use it to replace the appropriate values in the G-code snippet below. You can also specify coordinates where the print head should move during the pause by entering them in the X and Y positions in the code snippet. If you do not specify coordinates, the print head will move to X0, Y0 during the pause.
{REPLACE "\n; layer 27, Z = " "\n; layer 27\nG1 X0 Y0\nM300\nM0 Click to continue\n; layer 27 "}
Step 4
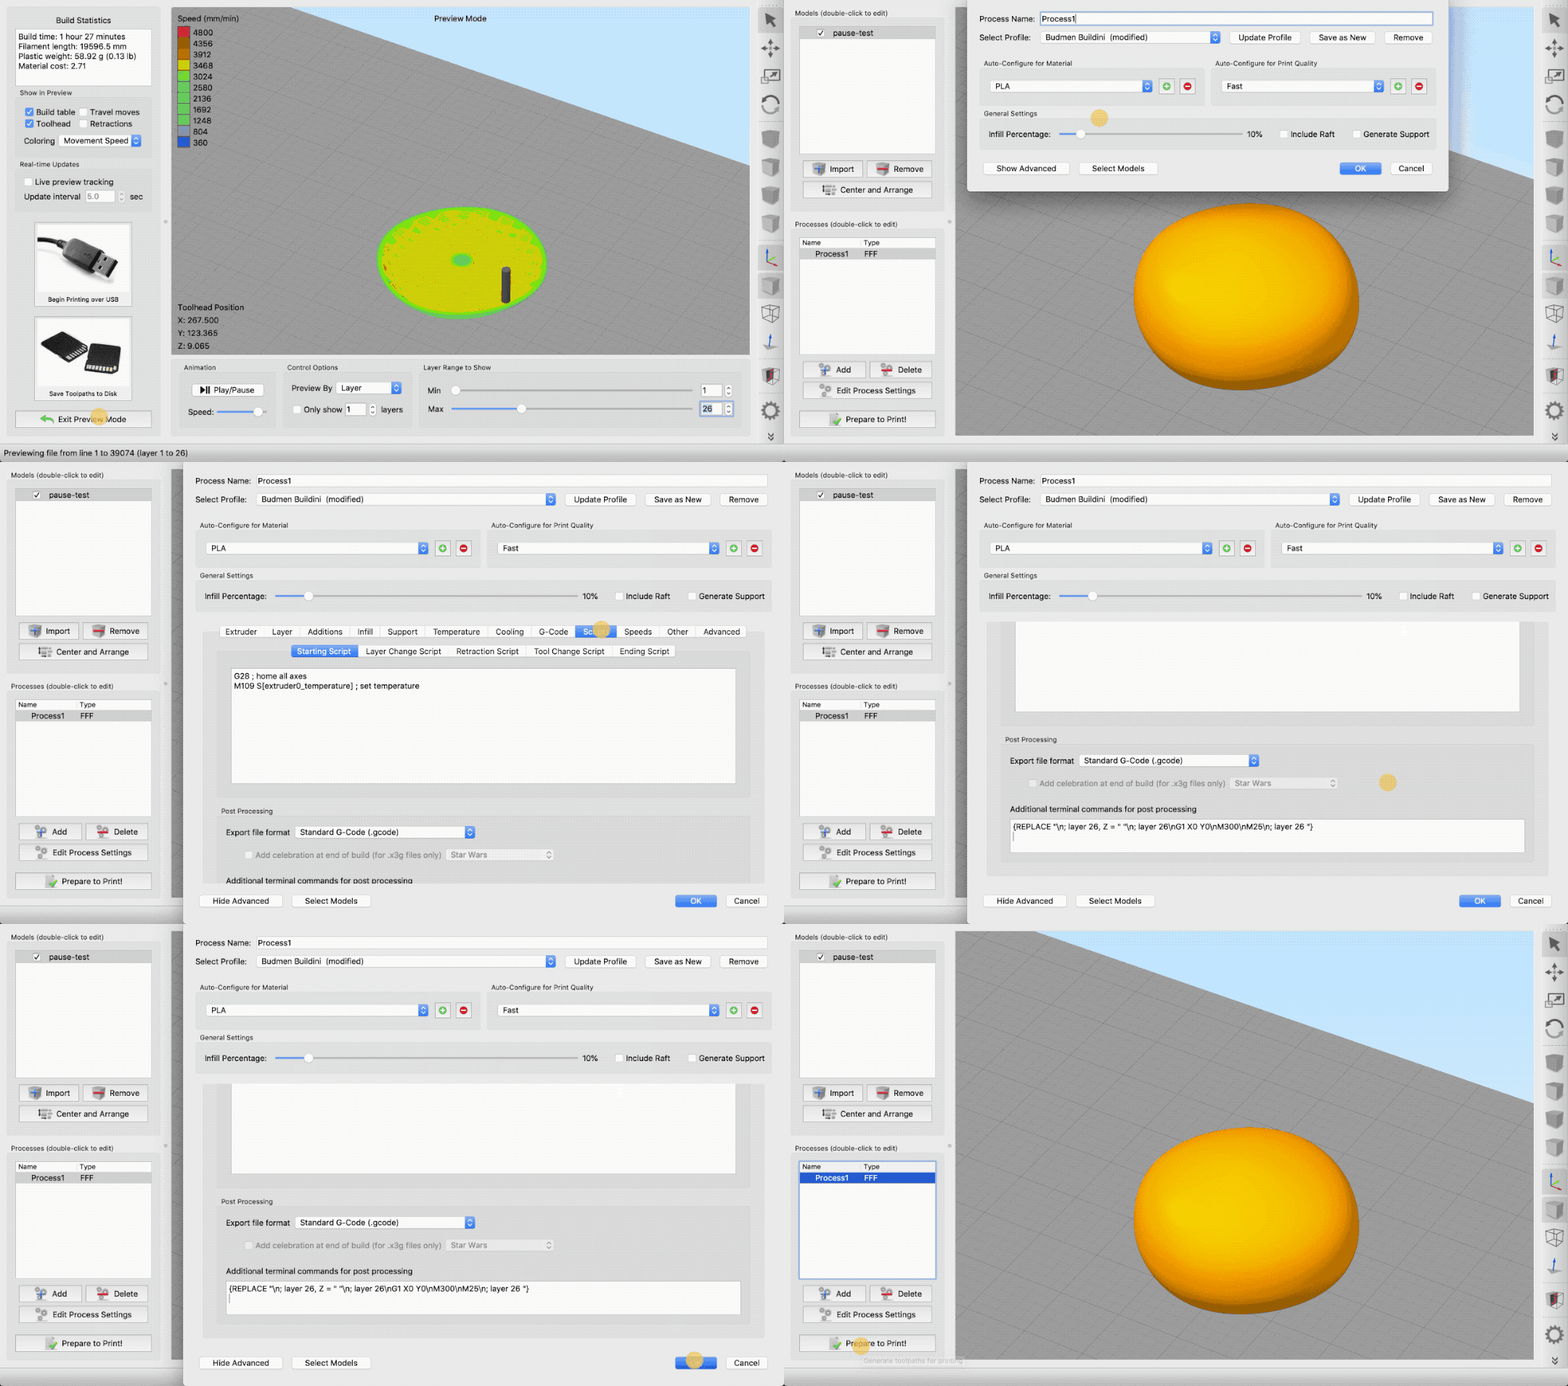
EXIT PREVIEW MODE AND OPEN SETTINGS
Exit the preview mode and open your Process Settings. At the bottom of the Process Settings window click Show Advanced. When the Advanced Settings open, click on the Scripts header. Scroll to the bottom of the Scripts Settings. In the box labeled Additional Terminal Commands for Post Processing copy and paste the code from the previous step into this box.
Click the OK button to apply your settings then click Prepare to Print.

Step 5
SAVE YOUR G-CODE AND PRINT
Save your G-CODE as you normally do and then send your 3D printer to work.
When the Printer arrives at the pause layer, change your filament or insert your fastener, and then click "Resume Print."
Pausing a print at a specific layer is as easy as that!

PRO-TIP
Before printing your object, it is a good idea to check your .GCODE file to make sure the Pause script was entered successfully. Open your .GCODE file in a Text Editor (such as TextEdit on Mac or Notepad on Windows). Use Command Find or search for the layer you had changed just to confirm the new code is there.
Appendix
G-CODE SCRIPTING
{REPLACE "\n; layer 27, Z = " "\n; layer 27\nG1 X0 Y0\nM300\nM0 Click to continue\n; layer 27 "}
This script uses a special text string for describing a search pattern called regular expressions. Regular expressions are powerful tools and can be used to do more than to add a pause to your G-code. In this tutorial, we won't be going into the scripting any further but to learn more, click the link above.
