USER GUIDE 5
Starting a 3D Print
Step-by-step guide to starting a 3D Print.
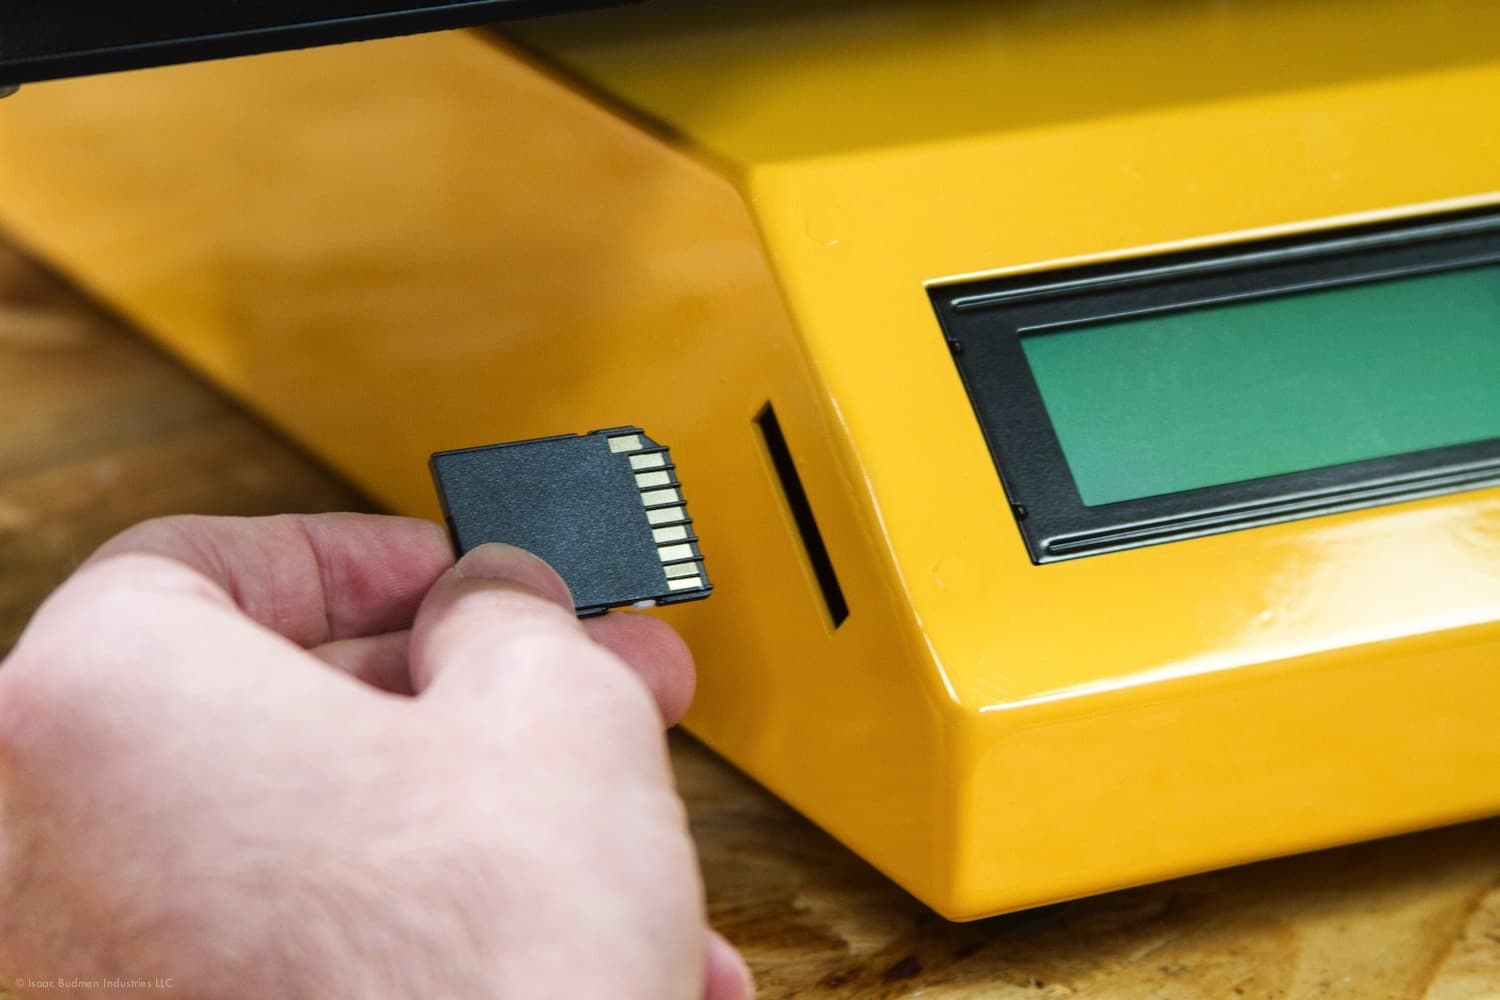
Step 1
INSERT SD CARD
Insert your SD Card into the SD slot located at the front left corner of the Printer. Make sure your SD card has a sliced job file on it, known as a G-Code file.
Step 2
NAVIGATE TO PRINT JOBS
On the LCD Screen navigate to the Print From SD menu by turning the Spin-N-Select Knob and click to select.
Step 3
SELECT PRINT JOB
From the Print From SD menu, navigate to the print job you would like to print, and click to select it.

PRO-TIP
Before selecting a print job, always make sure your build platform is level. It will save you time and make for a higher print success rate.